Read and write to your database with Python
Check out the companion Hex project for this tutorial here!
Although Hex supports writing dataframes directly to your database via Writeback cells and the hextoolkit, in certain situations, you may find yourself wanting to have more control over how Hex queries your database. You can always use pure Python to establish a connection and write tables to your database!
This tutorial uses Snowflake as an example, and we will be employing the snowflake.connector package throughout. If you’re working with a different database, you can use other connector libraries to connect to those databases (e.g. redshift_connector for Redshift and psycopg2 for Postgres). Using connector libraries is a method best suited for those who are comfortable in Python and have more complex writeback needs.
If you’d like to see what using a connector library looks like in Hex, you can check out this tutorial’s companion project here.
Import required packages
Begin by importing pandas and the additional required packages for connecting to your Snowflake database:
import pandas as pd
import snowflake.connector as sc
from sqlalchemy import create_engine
from snowflake.connector.pandas_tools import write_pandas
As mentioned above, we’re using the snowflake.connector package. Details about this package are available in Snowflake’s documentation.
Store credentials as Secrets
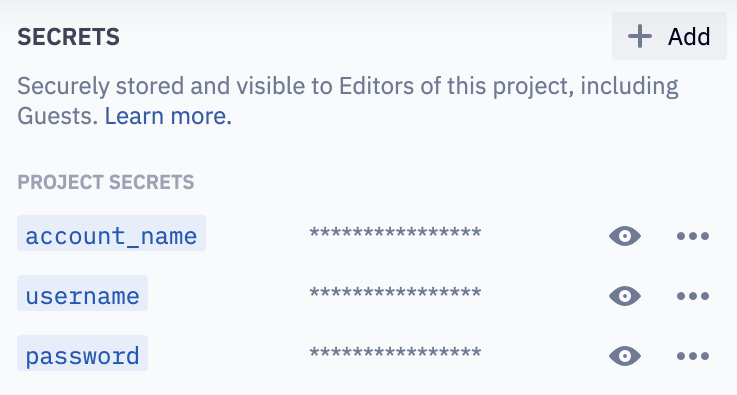
In your project's Variables tab, create Secrets for your Snowflake credentials: account_name, username, and password. If you are a Workspace Admin, you can alteratively create a shared Secret in the Administration Panel.
Establish a connection to Snowflake
Set up a connection to your Snowflake warehouse, using the Secret values set in the previous step. We're using our Demo Warehouse as an example in the snippet below.
conn = sc.connect(
    user=username,
    password=password,
    account=account_name,
    warehouse='DEMO_WH', #Insert your warehouse name here
    database='DEMO_DATA', #Insert your database name here
    schema ='PUBLIC' #Insert your schema name here
)
Set session parameters
Here we’re defining the session parameters for the warehouse, database, and schema. You'll need to change the "DEMO_WH", "DEMO_DATA", and "public" values as needed, depending on your database!
conn.cursor().execute("USE WAREHOUSE DEMO_WH")
conn.cursor().execute("USE DATABASE DEMO_DATA")
conn.cursor().execute("USE SCHEMA public")
Create and load data into a new table
First, create (or replace) a table and define all columns.
conn.cursor().execute(
    "CREATE OR REPLACE TABLE"
    "test_table_py(col1 integer, col2 string)")
Then, insert data into the table you've created.
conn.cursor().execute(
    "INSERT INTO test_table_py(col1, col2) VALUES " +
    "    (123, 'test string 1'), " +
    "    (456, 'test string 2')")
Reading and writing to a table can also be done using pandas functions. See the section below for an example of this.
Query the newly created table
Snowflake has some great help docs that go into this in more detail. See those here.
Here, we're fetching col1 and col2 from the new table:
for (col1, col2) in conn.cursor().execute("SELECT * FROM test_table_py LIMIT 10"):
    print('{0}, {1}'.format(col1, col2))
Alternatively, you can do the following:
pd.read_sql("SELECT * from test_table_py LIMIT 10", conn)
Put it into practice
Now that you've set up your connection details, you can write your query and then use pd.read_sql() to execute it and return a dataframe!
query = '''SELECT * FROM test_table_py LIMIT 10'''
df = pd.read_sql(query, conn)
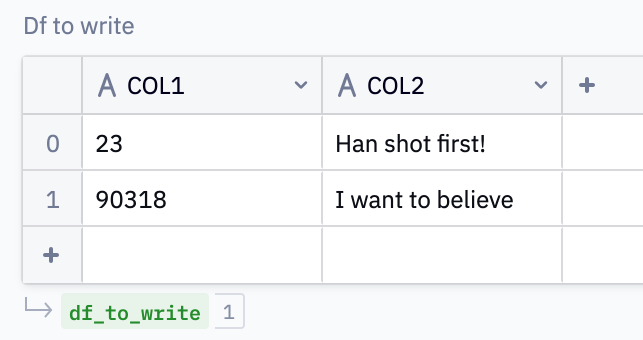
Let’s also write to the table we’ve created. We can use an Input Table to enable users to write their own data values back to the database.
In our example, the Input Table is named df_to_write.
You may want to ensure that users are being intentional when they choose to write a table back to the database. This is great use case for Run buttons! Our example uses a button called write_back.
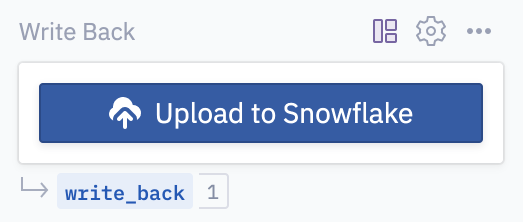
A quick refresher on Run buttons: the output of a Run button input is a boolean which evaluates True if a user has pressed the button and False if they haven't.
The idea here is that we only want to write the table back to the database if the user has explicitly pressed the Upload to Snowflake Run button. Feel free to customize this button’s color, icon, and text.
We can use the following to accomplish this:
# If the user presses the button, write df_to_write to the db
if write_back:
    success, nchunks, nrows, _ = write_pandas(conn, df_to_write, 'TEST_TABLE_PY')
    new_df = pd.read_sql(query, conn)
    print('Write Back Successful!')
    print(new_df)

# If the user hasn't pressed the button, prompt them to do so
else:
    print('Press the button to write back to the test table.')
This marks the end of this tutorial! You should now have a solid grasp on how to connect to your Snowflake database, create & load data into a table, and query tables, all using the Snowflake connector. If you want to dig further into what’s possible with the snowflake.connect, check out Snowflake’s documentation for more ideas and examples.
As a reminder, you can check out this tutorial’s companion project here!