Memory management in Hex
Avoid the "OOM" (Out of Memory) and optimize your Hex project's performance.
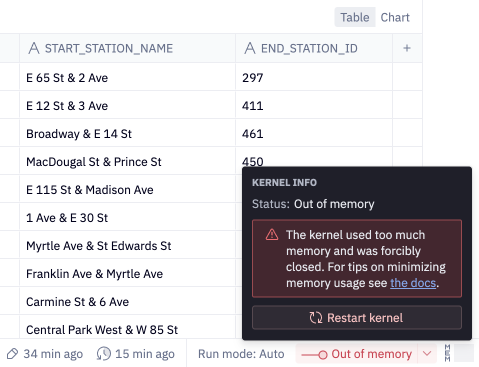
If you've ever hit the dreaded "OOM" (Out of Memory) error, or noticed your project's memory indicator drawing uncomfortably close to the limit, this tutorial is for you.
Memory basics
Hex projects are powered by project kernels that come with a finite amount of memory. When you query data from a SQL cell, or pull in data via an API in a Python cell, that data will by default be stored in your project's memory. A SELECT * on a large warehouse table could easily hit up against your project's memory limit.
When this happens, your first instinct may be to upgrade your project's compute profile size. This will increase the memory limit and can prevent an "OOM". However, there are alternative strategies to consider that can actually reduce your project's memory requirements, with the added benefit of speeding project runtime.
Let's explore these different strategies.
Strategy 1: Pushdown
Pushdown generally refers to a computing method that offloads as much of the processing work as possible to the database level rather than the application level. This is beneficial because the database's optimized processing capabilities are generally better equipped to handle complex operations such as aggregations and joins. Pushdown also drastically reduces the amount of data that needs to be transferred, processed, and stored in memory at the application layer. That's why pushdown is Memory Management Strategy #1!
Hex SQL cells use query mode, to pushdown processing to the warehouse, preventing your data from being loaded into your Hex project memory.
Pushdown with Query mode
Query mode is a Return mode that you can enable on Hex SQL cells to more efficiently query warehouse tables.
In contrast to the default Dataframe mode, which returns SQL cell results to your Hex project memory as a Pandas DataFrame, Query mode returns a "Query object" that simply points to the query result where it resides in the data warehouse. With Query mode, the queried data itself is not loaded into your Hex project memory.
Let's look at an example. The SQL cell below runs SELECT * on a warehouse table with nearly 20 million rows. Query mode is enabled, so the SQL cell returns a query object instead of a dataframe object.
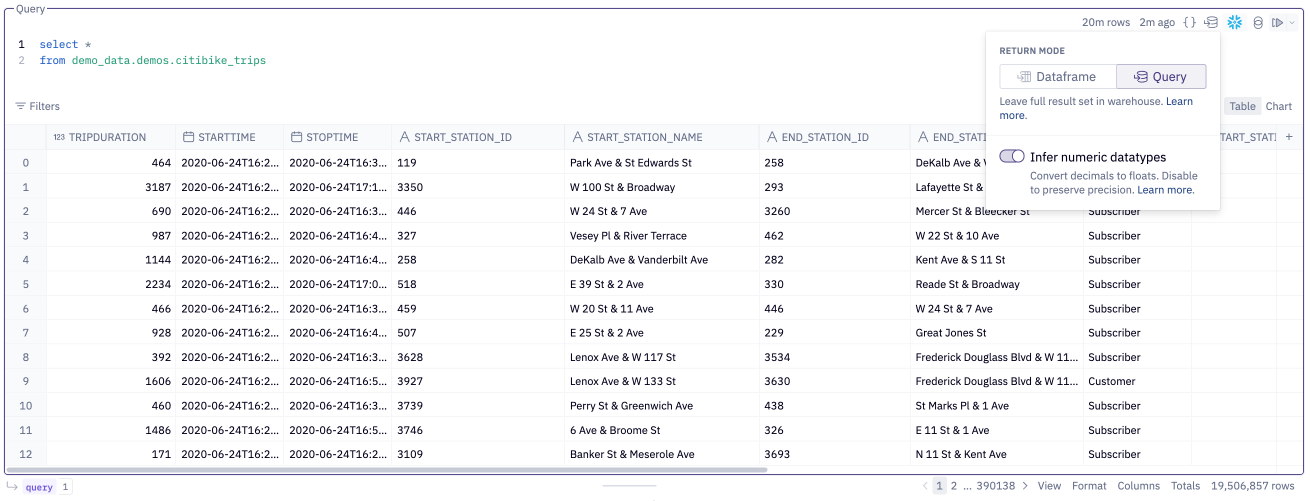
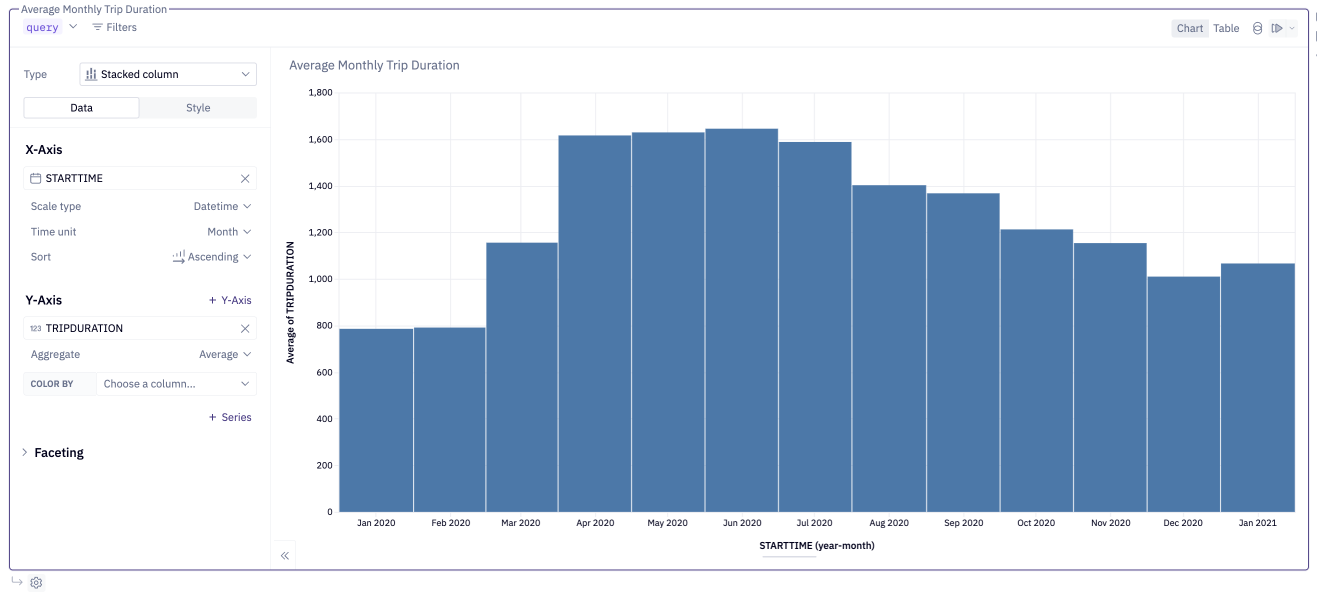
The query object can be referenced in downstream cells just like any other SQL cell result. This enables you to perform sophisticated analytics workflows on large datasets without hitting the project memory limit.
There are some exceptions to the cell types that can reference a Query mode result without loading it into project memory: Python cells, SQL cell using Dataframe mode, and Writeback cells will all convert a Query mode result to a Pandas DataFrame and load it into your Hex project memory. Be mindful when using these cell types on a to avoid an "OOM" error.
Strategy 2: Increase memory limit
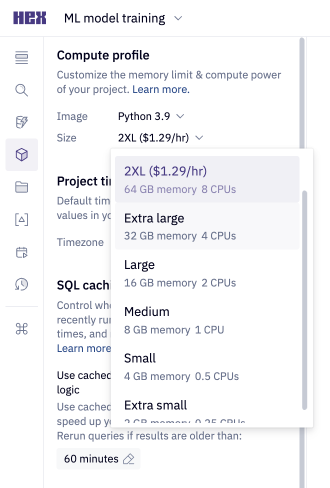
While we highly recommend exploring pushdown strategies as a first resort, some data workflows simply require a higher memory limit. If pushdown is ruled out for you because you're both A) working with a large dataset in Python; and B) unable to use Snowpark, then a larger compute profile size may be the right solution for you.
You can select a new compute profile size from the Environment sidebar in the Notebook view. Note that up to Medium sizes are included for all customers, but advanced compute profiles are available only on the Team plan and higher.
Strategy 3: Optimize project contents
If you've exhausted pushdown and compute profile upgrades, you could consider optimizing your project contents by saving variables to files stored outside your project kernel's memory, or even modifying data types to trim memory utilization.
Save data to files
If you have a variable in your project that you don't need now but will need to reference later, you can save it as a file in your project. Any files you write to the working directory in your environment will be saved as part of your project, but will not utilize project kernel memory.
For dataframes, a common way to do this is to write them as a CSV in your Python code. This example writes a dataframe to a file called "saved_df.csv" in the project.
df.to_csv('saved_df.csv')
You can use read_csv() from Pandas to read the saved csv back into memory later in your project.
import pandas as pd
df = pd.read_csv('saved_df.csv', header=0, index_col=0)
Modify data types
You may be able to shrink the memory usage of a dataframe by changing the data type of some of the columns. You can check the data types in a Python cell like this:
variables_df.dtypes
Based on these types there are a few common conversions you can make to save memory.
- object -> category
- Convert object columns to category columns if there are relatively few unique values in this column compared to the number of rows.
- float64 -> float32
- Convert float64 columns to float32 columns unless you need 16 digits of precision.
- int64 -> int32
- Convert int64 columns to int32 columns unless your data is outside of the range (-2147483648, 2147483648).
You can convert data types in a Python cell. This example converts a column called "example_column" to the category data type.
df['example_column'] = df['example_column'].astype('category')